The quick answer
To run SAP on a Mac, you install SAP GUI for Java — SAP's official Mac version. The SAP GUI for Windows does not work on macOS, so this is the version every Mac user needs. The full setup has three simple parts: (1) install Java if your version needs it, (2) install SAP GUI for Java, and (3) add your server connection and log in. It works on both Intel and Apple Silicon (M1/M2/M3) Macs, and the whole thing takes about 15–20 minutes.
Key takeaways
- On a Mac you use SAP GUI for Java, never SAP GUI for Windows.
- Setup = install Java (if needed) → install SAP GUI for Java → add your server & log in.
- Newer versions bundle Java. On Apple Silicon Macs, if you do install Java, use SAPMachine.
- The most common snag is the macOS "unidentified developer" warning — just choose Open.
Full video walkthrough
Prefer to watch? This is the complete walkthrough from the VoiSAP YouTube channel. The written steps below follow the same order, with a screenshot for each stage.
Install Java (if your version needs it)
SAP GUI for Java runs on Java, so older versions need Java installed first. The video below shows this using Oracle Java — follow along if your installer asks for Java.
Download Java
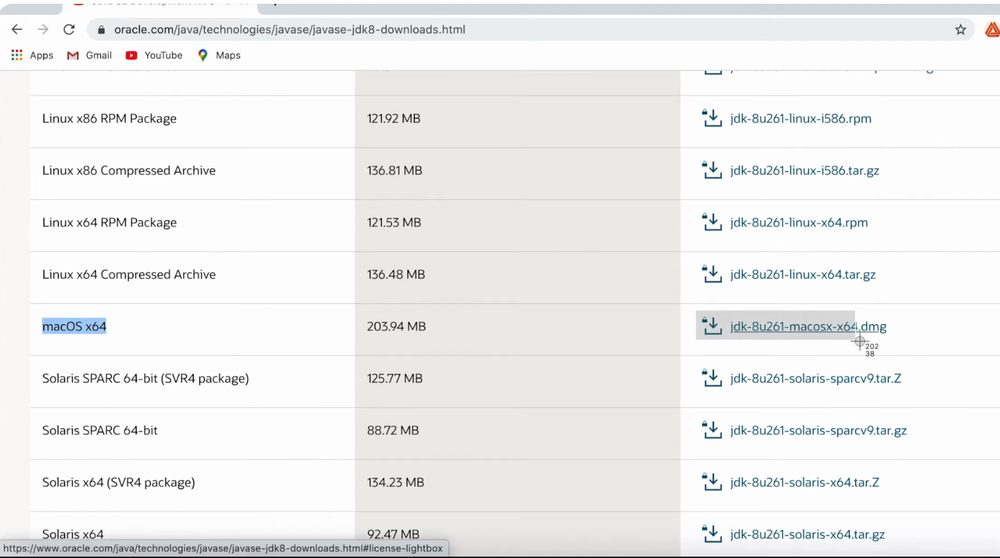
Get the Java installer for macOS. In the video, this is downloaded from Oracle's Java site — pick the macOS .dmg download.
Install Java
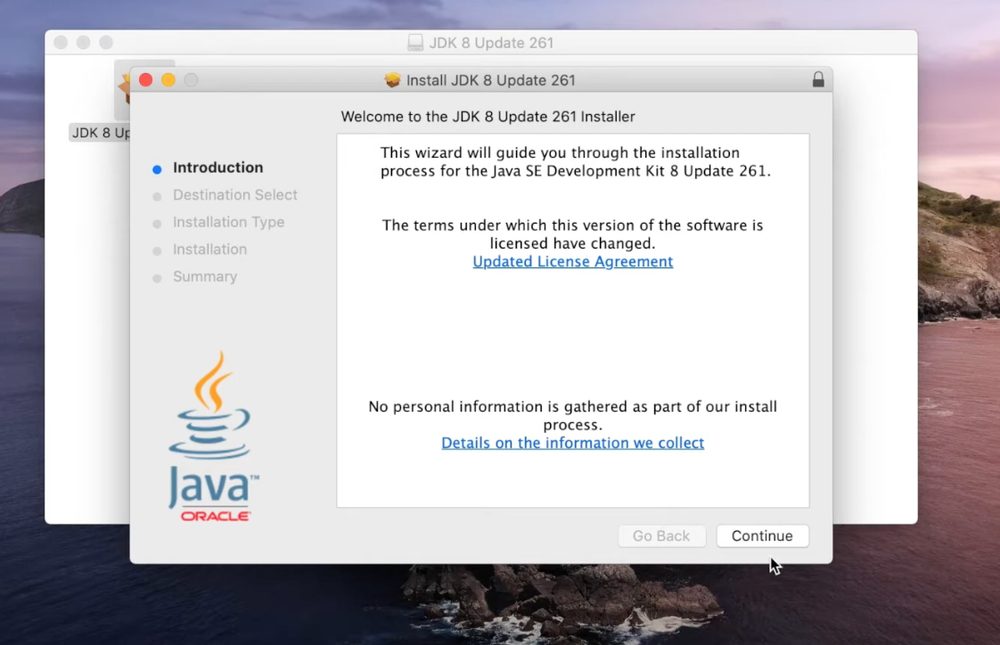
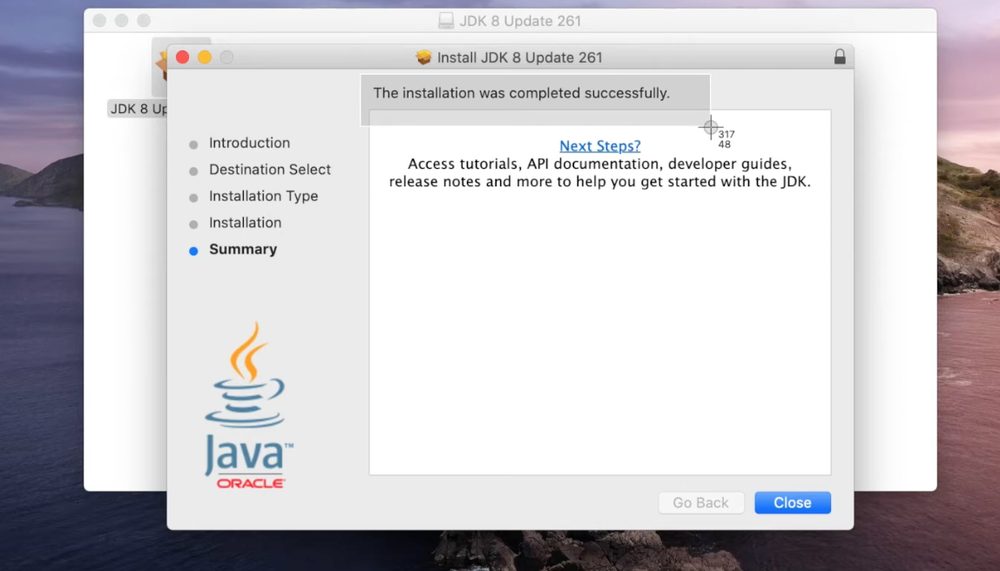
Open the downloaded Java file and run the installer — click Continue, then Install, and accept the defaults. When it says the installation completed successfully, Java is ready.
Install SAP GUI for Java
Now the main event — installing SAP GUI for Java itself.
Download SAP GUI for Java
The official source is SAP's own Software Center, which needs an S-user account (issued to SAP customers and partners). If you're training with VoiSAP, we simply hand you the correct installer file — no account needed.
Open the installer & allow it past the security warning
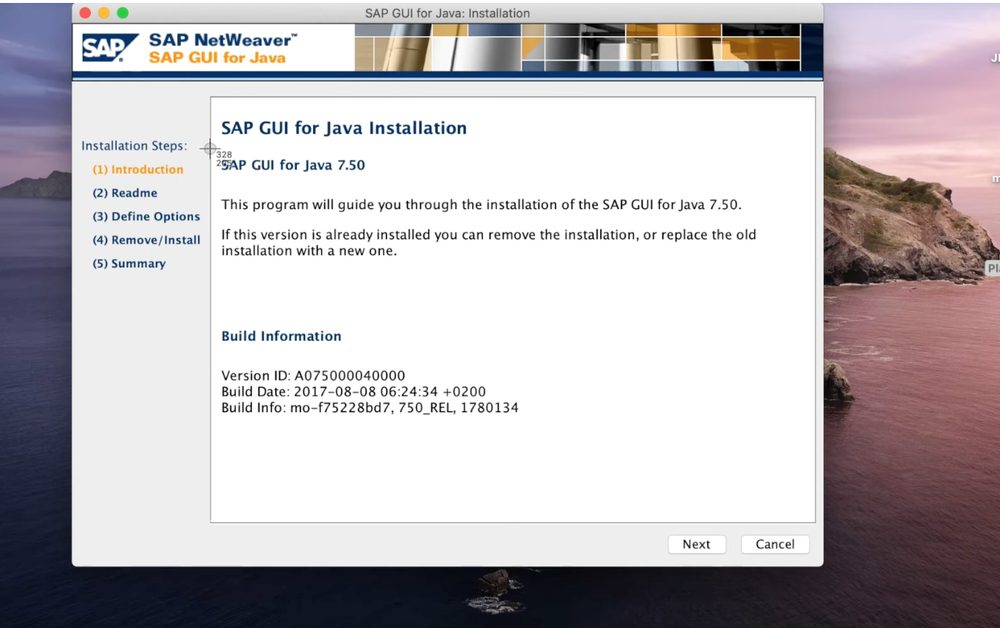
Open the file to start the SAP GUI installer. Your Mac may warn that it's "from an unidentified developer." This is completely normal — just choose Open, or right-click the installer and choose Open, or allow it in System Settings → Privacy & Security. This is the single most common place people get stuck.
Complete the installation
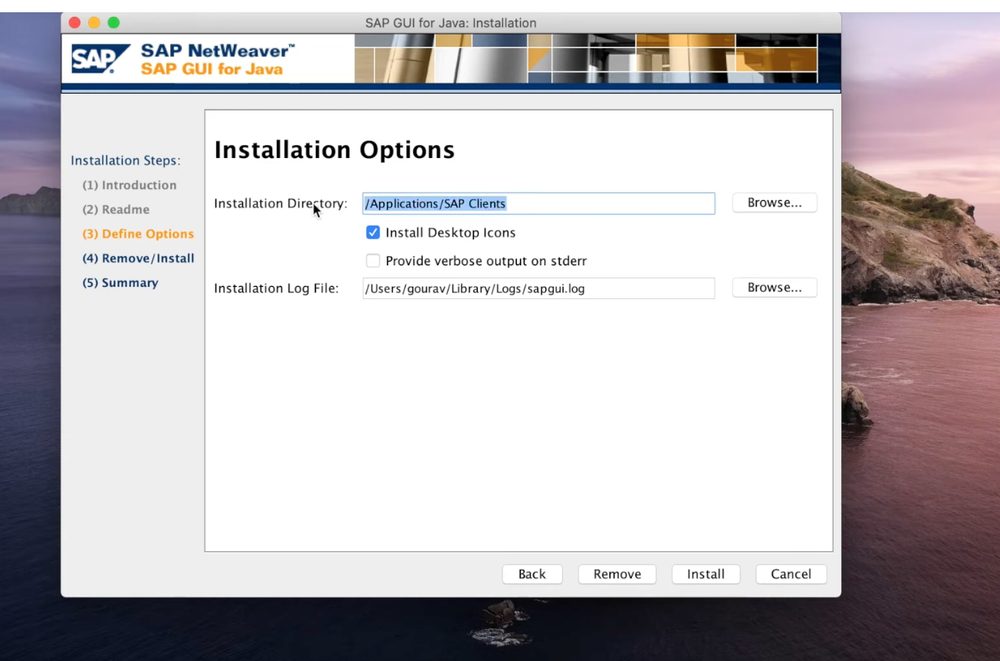
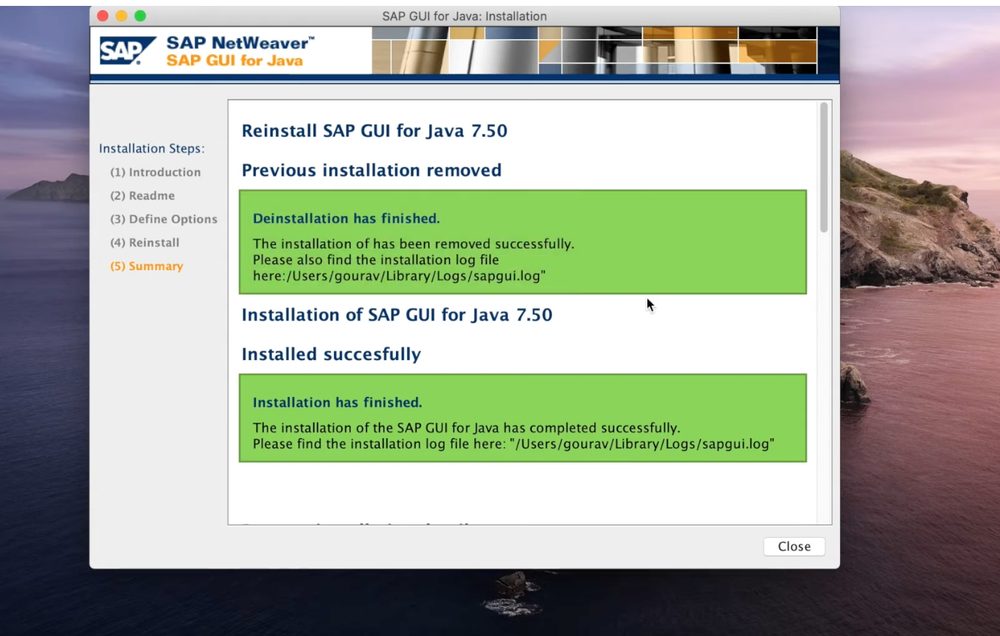
Click through the wizard — Next past the intro and readme, keep the default install directory (/Applications/SAP Clients), then click Install. It takes a couple of minutes, then shows Installed successfully. Click Close.
Connect to the server & log in
SAP is installed — now connect it to a live SAP system and sign in.
Open SAP GUI for Java
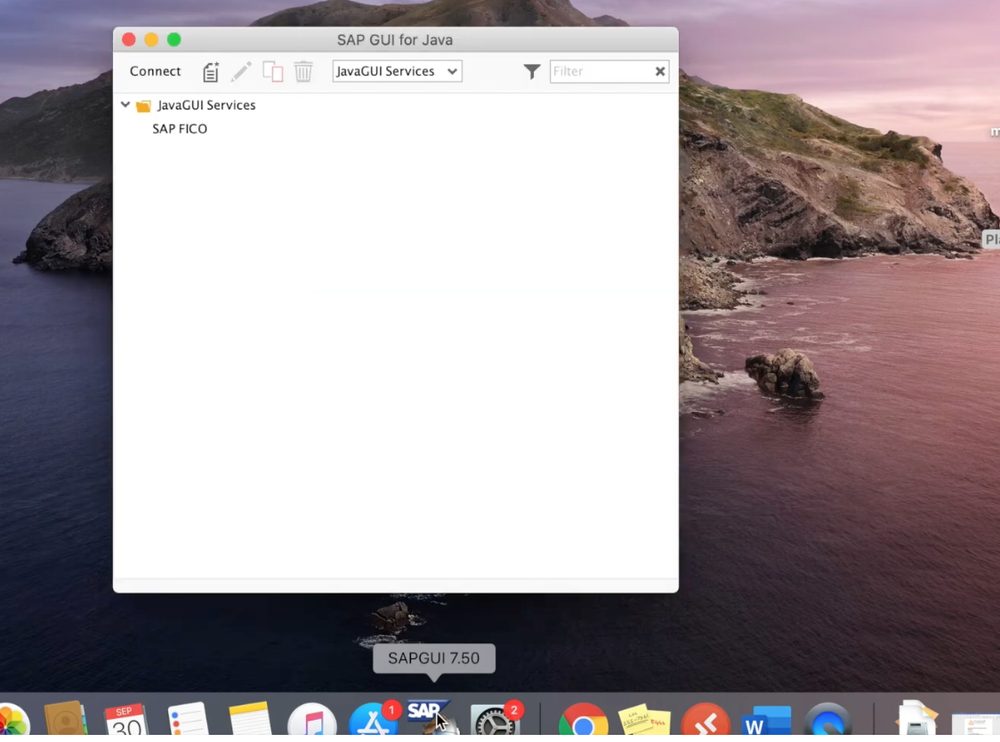
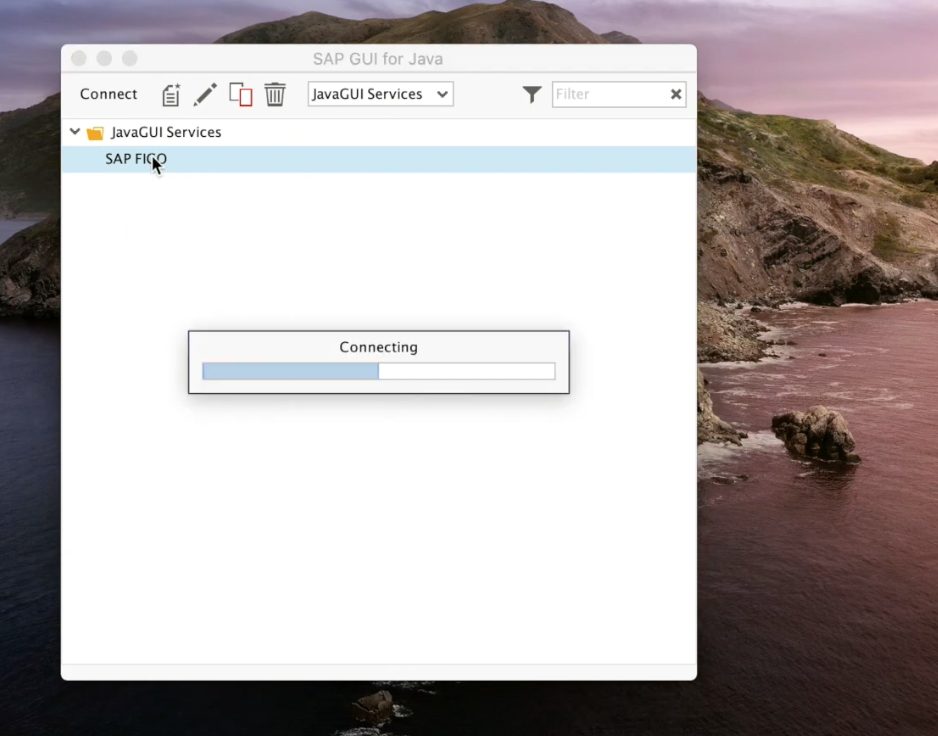
Find SAP GUI for Java in Launchpad (inside the "SAP Clients" folder) or in Applications, and open it. The connection window looks empty at first — that's normal, you just haven't added a system yet.
Set up the server connection
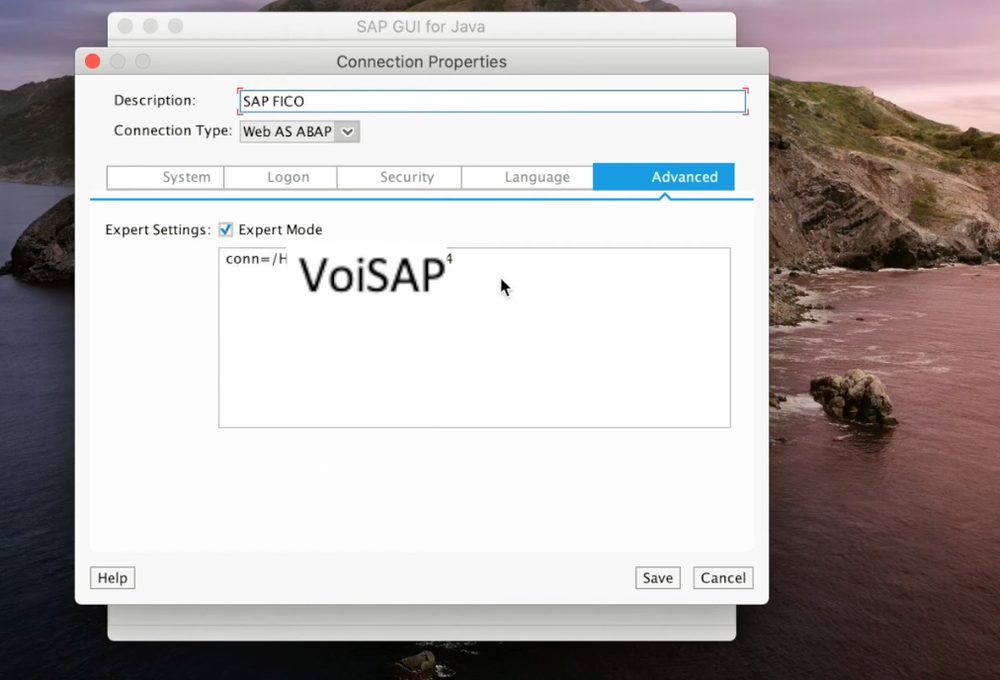
Click New (create-new), go to the Advanced tab, tick Expert Mode, and enter the connection string for your SAP system. It follows a pattern like conn=/H/your-server/S/32NN, where the system number sets the last digits (system 00 → 3200, system 07 → 3207). VoiSAP students get their exact connection string from us — just paste it in and save.
Log in — and you're in
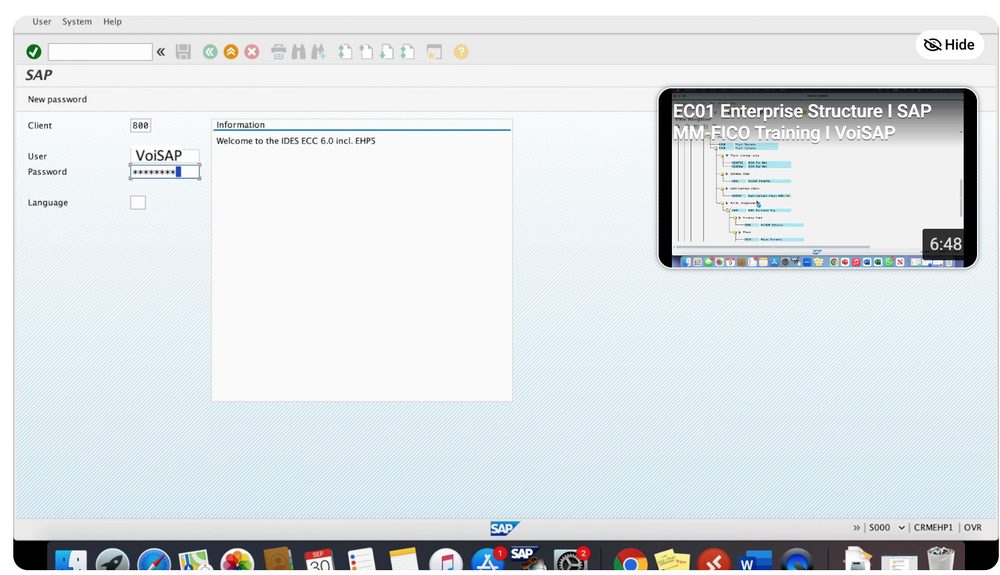
Select your saved connection and click Connect. Enter your client, username and password (on a first login you may be asked to set a new password). Once accepted, SAP opens and you're ready to work.
FAQ & common problems
Installing SAP is step one.
Knowing what to do inside it is the career.
Live SAP FICO, MM, SD, and User Level training with real hands-on system access — the functional skills employers hire for, plus full career support for the Canadian market.
*93% placement rate among students who completed the programme and engaged with placement support. Individual outcomes vary.